Friday, April 7, 2023

Modeling and Mold Making


MODELING AND MOLD MAKING

Little People Chicken and it's Coop

        Before mold making could even come into the picture, I had to explore the medium I was making a model in.  The plasticine clay is soft but workable, though overall doesn't lend itself well to tremendous amounts of detail.  After fooling around with it's capabilities, I selected an object to replicate.  I choose a childhood treasure of mine, Little People Chicken.  This chicken was glued to my hands as a child, creating a "dedicated chicken hand." leaving only one free hand to work around.  The end of the Little People Chicken era came when I received a second one, in which my rights were revoked as I then had two dedicated chicken hands and no free ones.  The love Little People Chicken got created a dirt layer on the figure, preserving it from becoming sticky like the rest of the Little People we owned, allowing it to remain with me as it withstands the test of time.

        To me, the chicken embodies that child-like obsession and wonder that objects have, where one toy can be what an entire life revolves around with little consequences or reason.  Only in childhood can you cling to a toy and have it be socially acceptable, which feels strange based on how much joy one little item can bring.  I can only image the comfort of the chicken's constant presence especially with how naturally my hand curled around it, a comfort I will never being able to recreate as my hands have grown significantly and the mindset the chicken worked best in has passed.  However, the Little People Chicken is still adorable and I still retain a soft spot for that pudgy face.

        Little People Chicken lends itself well to mold making as it was originally created with a mold, though based on it's composition, it'd assume a different process than the one I was about to use.  Based on brief research, the chicken likely used hollow casting, in which a seamless object can be produced by putting the plastic through a hole in the bottom.  This method is done with an industrial setting, where any medium can be used with ease (metal, plastic, etc.)  However, the chicken is simple and has rounded edges, making it perfect for creating a replica with any medium.  In the end, my version came out ever so slightly bigger, likely due to the softness of the clay preventing full accuracy.

        When it came to mold making, the process was simple: create a temporary clay half to embed the chicken to pour the first side of silicon, remove all the temporary clay to pour the corresponding half of silicon, then plaster poured on each side to keep the mold secure from wobbling during the casting process, and finally cutting it open to create pouring/air channels to make the casts.  I ended up with four complete chickens, which I decided to paint various different colors (with one being a replica of the original colors).  I suppose I wondered if someone else held a chicken just like me, and making different colors was a call to think of the different journeys their chickens went on.


WORK IN PROGRESS

MODEL WIP


Messing with the clay, I created a swirly dragon

WIP of model chicken (the original was kept in a bag to keep it clean)

FINAL PHOTOS OF MODEL


MOLD MAKING WIP


I created a house to make my mold (the triangle at the top later perished so the mold was more flat while working on it)


I embedded the chicken into the clay

Putting the clay block into the mold

Removing the bottom of the mold box to then remove the clay.  Here's the chicken peeping out (I left a huge air pocket around the bottom of the model by accident which turned out to be a good thing when it came to removing the piece carefully)


First full chicken cast!


Four complete chickens (and one complete failure)

Painting

FINAL PHOTOS OF MOLD MAKING


Return of the dedicated chicken hand


Monday, March 27, 2023

Working with Wood

WORKING WITH WOOD


The Staff
40.5 x 17.5 inches

        When I did sketches I was looking for an interesting combination of shapes as well as something that felt achievable.  I'm a believer in the power of simplicity, so I wanted to arrive at a design with a strong silhouette.  I drew attached to two ideas from my sketches, one being a long piece sticking out from the main body and the other being a M shape with a diamond in the middle.  Originally the M was facing down, but when figuring out on the mini model how to attach the rod, I felt compelled to flip it over for more of a W so the vertical lines would go both up and down (the W with it's lines going up and the Y going down).

        In creating the piece, I decided on making it skinny and therefore easy to lift.  The design began to remind me of some kind of ancient religious/ritual staff, so I leaned into that direction.  If the piece was like a ceremonial piece though, I felt a need to capture the mysticism that powerful objects like that have in a thoughtful creation.  I hand-sanded the piece as it added that handcrafted personal touch artifacts often have.  I noted that with this approach my assembly should include no industrial elements, like nails or screws, which meant I wanted the connection points to be invisible as if held together with magic.  This turned the focus on carefully drilling holes and inserting dowels to leave little to no trace once the pieces were connected.  Once the whole thing was assembled I sanded the joined pieces so they were mostly flush with each other again.

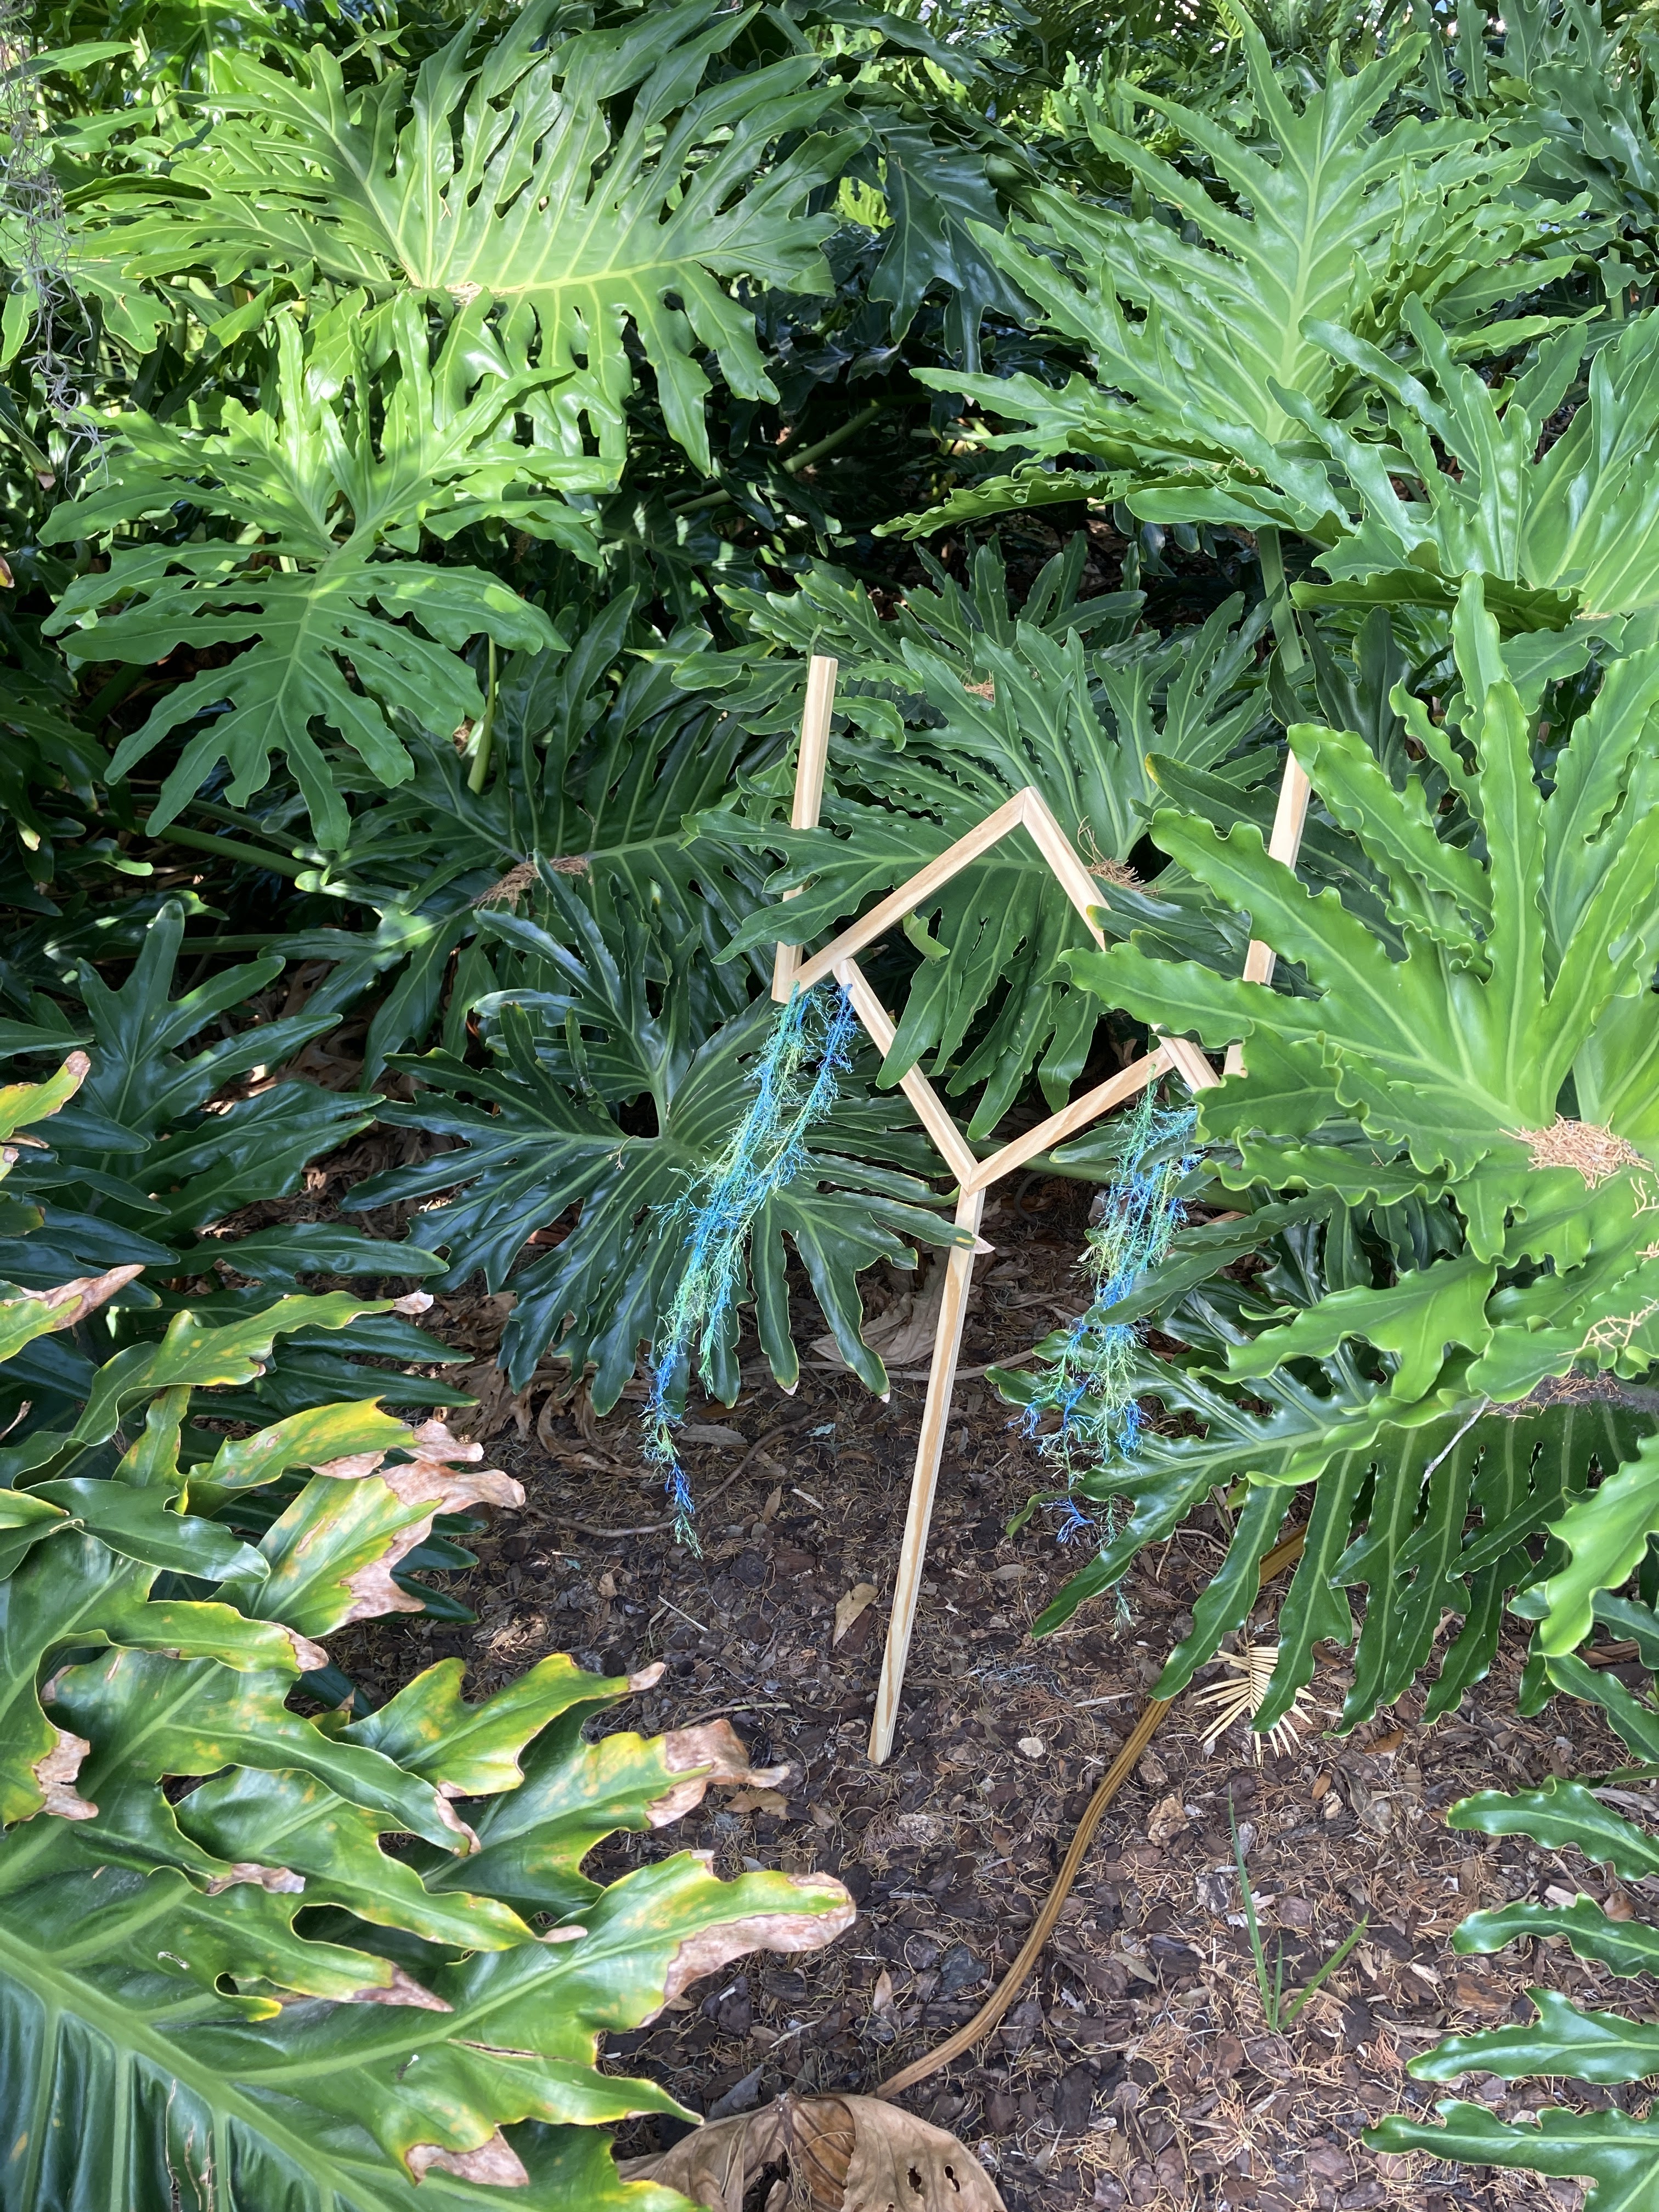
        I deliberately left the holes originally found in the wood visible and placed them to be somewhat even on both sides and on the lower points of the W.  From there I strung through textured yarn to mimic plants that you often see growing from hermit's staves in media.  Fortunately, my choice of lightweight yarn created a fluid movement when the staff is swung around, similarly to how Spanish moss flows on ancient trees.  The final dilemma was in regards to my original plan and the inclusion of a base.  In the end, I determined the staff was a staff, it's at peak power being held over any kind of base.  You ARE the base!

        This was the first time that a project I was doing really took on a life of it's own and I was merely only to follow it.  Things I planned, such as the base, and things I didn't, such as the hanging elements, all contributed to an interesting process.  In a way, the staff seeming to know it's own destiny almost adds to the mystical nature of it, something that I didn't expect at all.  When photographing it, I decided to make it appear as though you just discovered it in the deep woods, as if it was waiting, to harken back to the ride that it took me on.  Do you accept?

WORK IN PROGRESS

My sketches and mini-model

Cutting and mock-up of the final wood pieces

The start of the assembly (all the angles first)

Big Jump to fully completed and sanded staff

First hangings test (just some random spare sewing thread)

Testing out different hangings (Identity Protecting Wizard Costume TM)

EXTRA PHOTOS


Monday, February 20, 2023

Foam and Plaster Project


FOAM AND PLASTER PROJECT

 Zion
24 x 18 inches

My goal with Zion was to really emphasize interaction between the piece and viewer by creating spaces that must be investigated closer, encouraging viewers to look around in all angles to get the full experience.  This isn’t dissimilar to my childhood trip through the western United States’ desert landscape, my inspiration, where when we drove past I kept my head focused on the structures for as long as possible to soak in the full magnificence.  However, the US’s desert isn’t exactly accessible to everyone, so I look at Zion as bringing a small fraction of my childhood experience to the viewer and hope they feel the same.

I began with sketching out ideas guided by the examples that showed what the materials are capable of.  Two things stuck out to me, the first being that many hard edges would be challenging to make look neat and the second being that the layering the foam with plaster application looks like rocks.  This led to my inspiration of the most incredible rock structures remember seeing as a child: Monument Valley, Arizona and Arches National Park, Utah.  With those in mind, I drew up a holey rock structure that rose vertically, and for visual interest I made it asymmetrical with the bottom being narrower than the top.

Using a paper template to get accurate shapes each time, I traced my design onto the foam panels across the whole width.  Upon cutting the first shape, I noted that the reverse side lined up nicely with the original shape, thickening the structure and creating more interesting holes.  I stacked the final pieces I noted the cool depth of the holes was undermined by the flat exterior surface.  Following the trend of using excess foam from my piece, I took the scraps from the holes I cut and attached them to the outside for more interest (with the bonus additional cohesion between the holes and the bumps repeating shapes).

Once the piece was glued, I cut away at the edges to smooth the whole piece down.  Most of the arches and towers I was inspired by have been worn down by centuries of weather to be fairly smooth, though not completely lacking texture, which was a balance I had to keep in mind.  Finally, I painted the piece a terra-cotta-esque color to harken back to the colors of the desert.  I originally thought I would exaggerate the depth with darker acrylic paint in the holes, but I found the natural shadows cast by the piece did that job for me.  I also found by getting closer with the spray paint I could get darker spots, which added the variation I was looking for.  In the end, Zion looked more like my inspiration and the vision in my head than I could ever hope for!


FINAL PHOTOS


WORK IN PROGRESS

My final concepts being circled on the left side


First Panel

Layered Together

Looking Flat

Additional Pieces

Clamped Together to Dry

Hidden Smiley Face

Shaved Edges

First Plaster Layer

Before Sanding

After Sanding

Lighting that shows the variation of the paint, making the surface seem bumpier than it actually is (in a good way)


No Body’s Home (Ceramics II - Spring 2023)

No Body’s Home Ceramics, Yarn, Foam Board, Wall Mounting Stickers Disassembly Stick Friend! Enthralled by the intricacy of spaces and how th...