SCULPTURE FINAL PROJECT

Animated Bones
9 in tall (being held, 13in from head to tail tip laid flat), 4 in wide
Without much plan in mind, I began sculpting what I originally intended to be a dragon but quickly turned into a skeletal dinosaur, inspired from my own bone shorthand developed from years of doodling. I painted and then varnished the clay, preparing to move to the next them of assembly. All seemed well until I quickly ran into problems with the clay I was using, it completely resisted direct contact with the varnish, and without that the paint around the holes would chip. So I naturally tried the next closest sealant, white glue. Once again, the clay resisted this and the white glue also peeled off. I assumed this was due to the clay's ability to be reactivated with water (therefore never truly drying), and unable to wait through any more lengthy dry times on a clay with such a detrimental property I opted to keep going.
Troubles continued as I attempted to create a wire skeleton to attach the bones. Perhaps I lacked the proper wire or the skills to work with wire, but either way I was very dissatisfied with my final skeleton. Hoping it would get better, I tried covering a small section with fabric, but without the quilt batting to keep the wire from sliding around inside I found it unmanageable. Finally ditching everything but the clay pieces, I pivoted to another movable figure type, a marionette. I'd always been somewhat interested in marionettes, mostly due to watching the 1965 movie The Sound of Music frequently as a kid and being fascinated with the yodeling puppets. Instead of wire, I now used yarn to string together the pieces. Once again trouble came as I had not designed the pieces for the stringing process of a marionette, so the final result was not able to move like it's inspiration would.
Although the final result isn't one I'm particularly proud of, the amount I learned going through the process is undeniable. I discovered that clay quality does actually matter, the limitations of wire, and to ALWAYS test my materials together before proceeding with a project using unfamiliar materials. Despite being displeased with the project, though I am my worst critic and all, I still hope the piece brings out that childlike fascination in others in the magical movement of toys like I had experienced growing up. I also hope that the story behind the process helps encourage others in their own pursuits to not give up at first try, but to continue on until the final result is achieved. I for one will not be stopping here and am eager to give this art form another attempt!
FINAL PHOTOS


Pile O' Bones

WORK IN PROGRESS
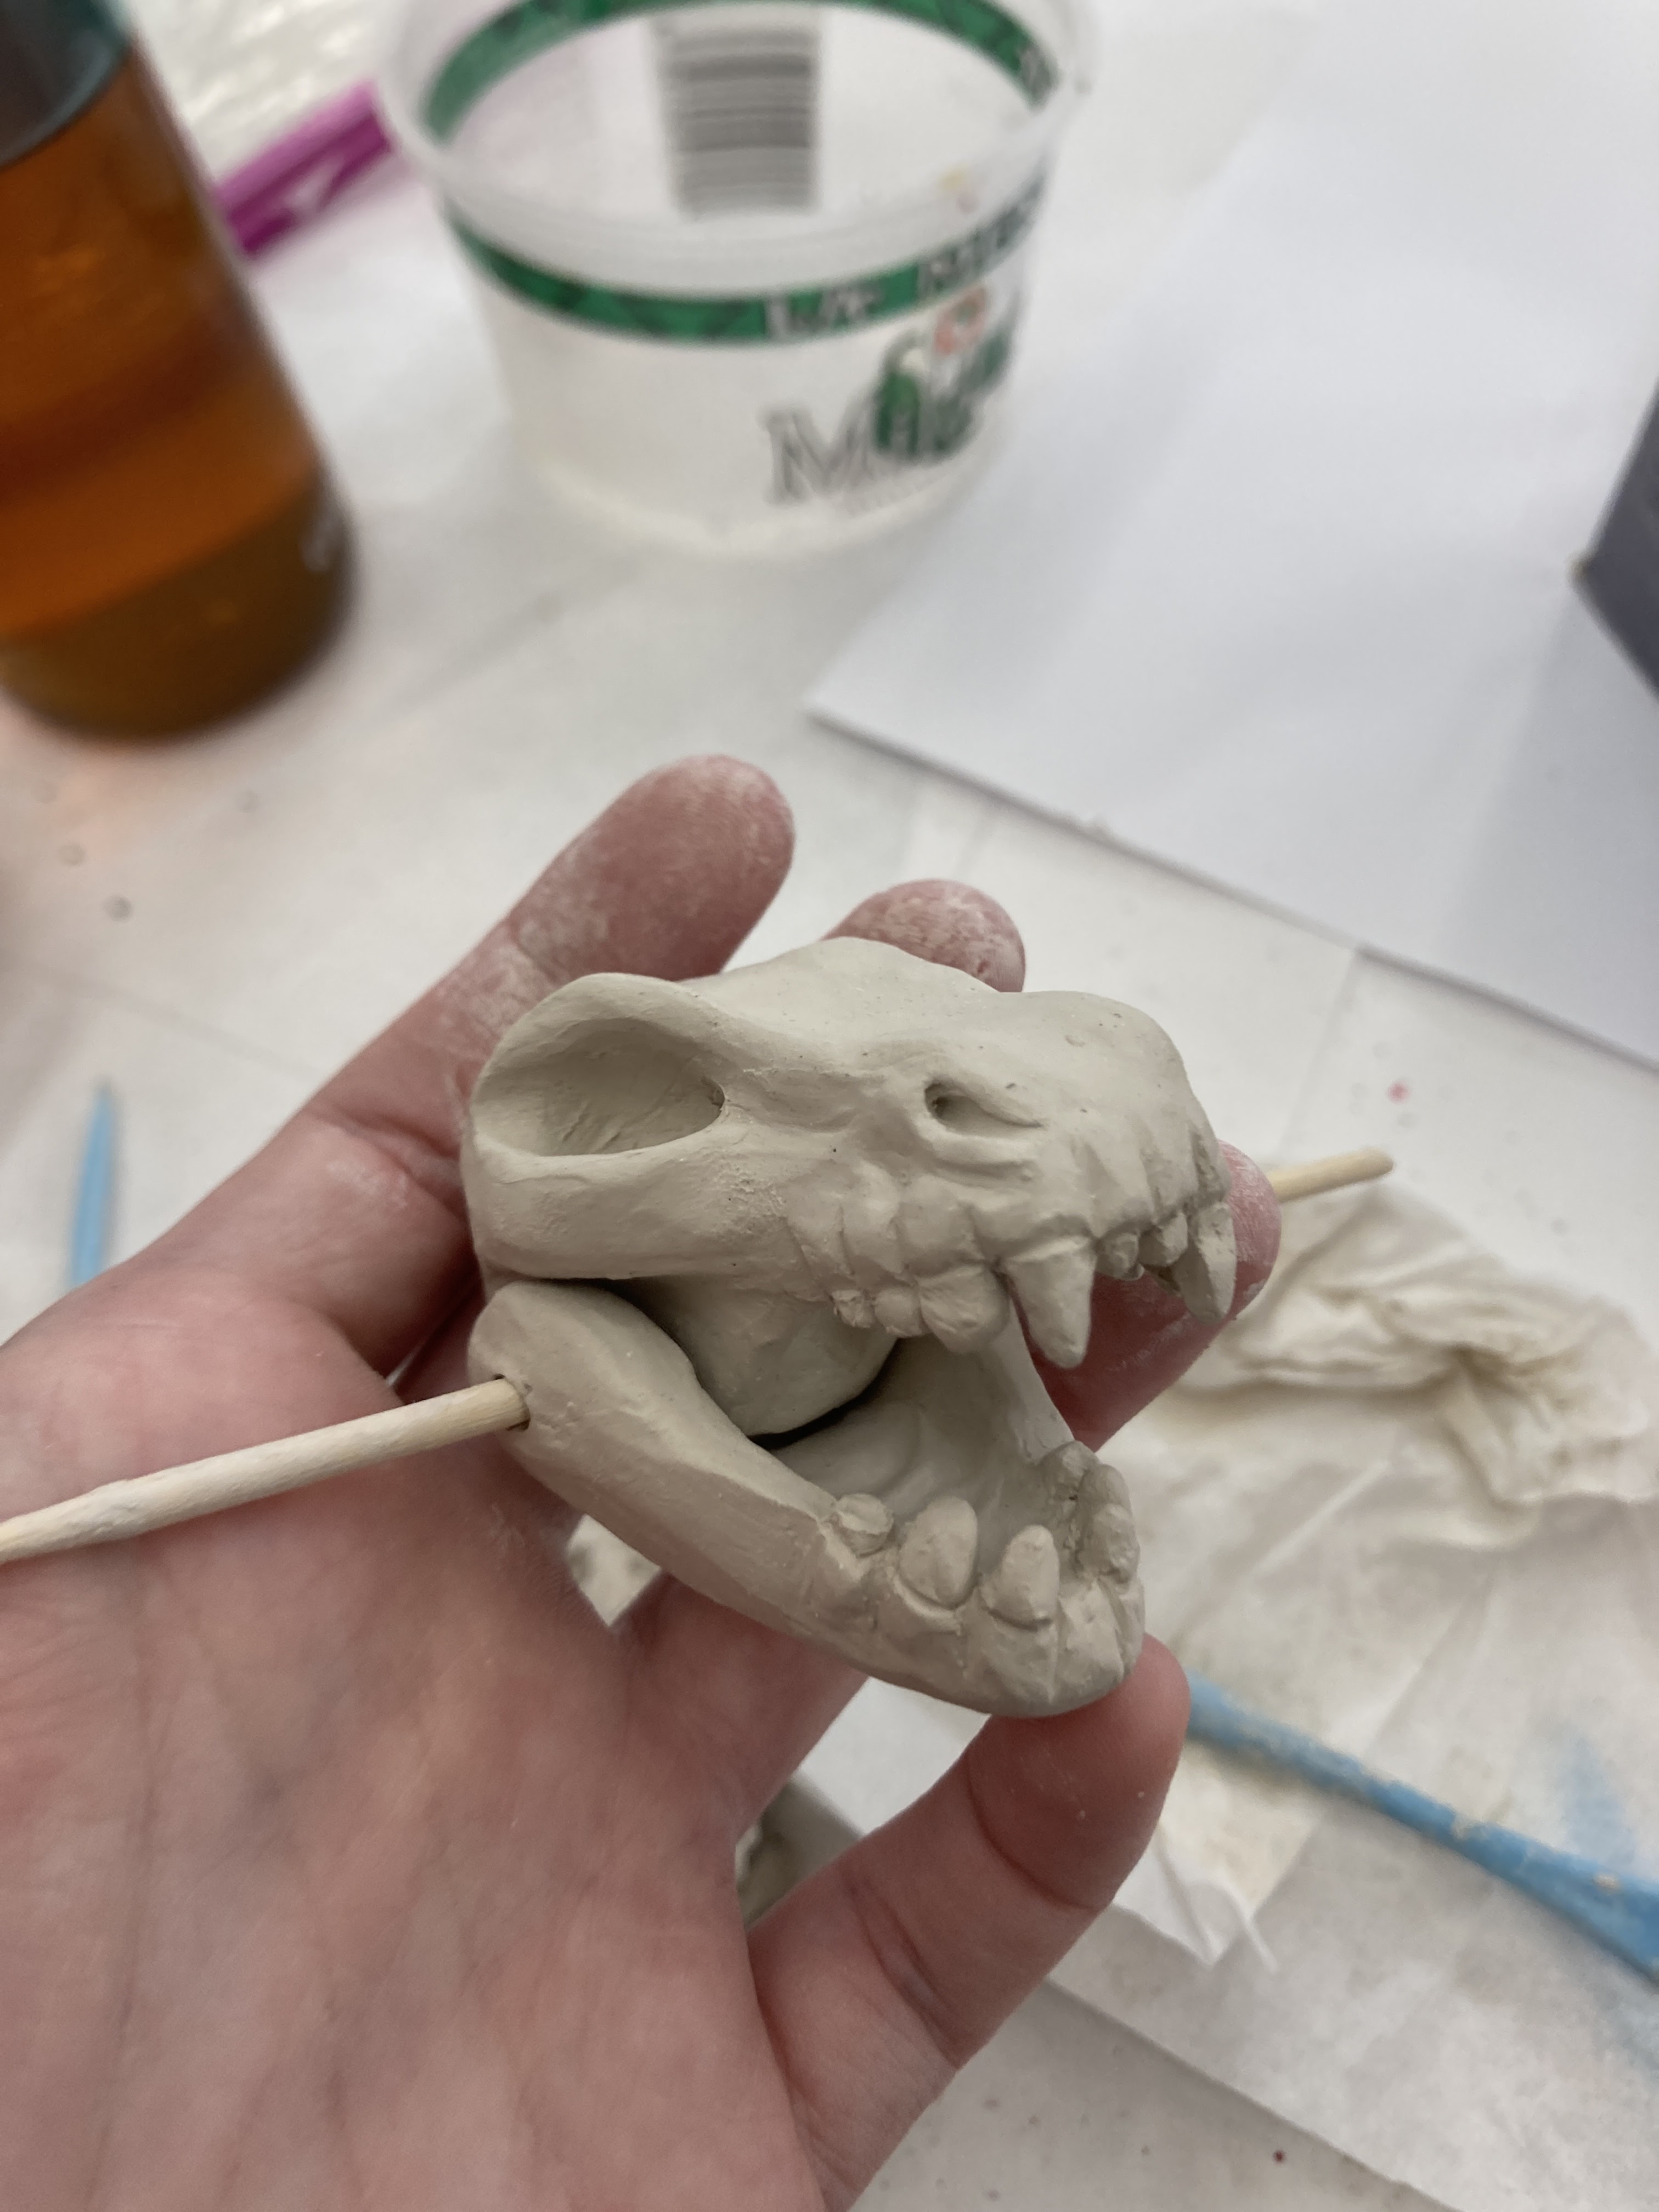
Head!

Feet!

Hands and Tail!

First test wiring

All pieces made

All pieces painted

Pieces drying after being varnished (the holes allowed them to be put onto rods for full coverage coats)

Wire Skeleton


Addition of fabric. In hindsight it looked decent, but the feel and movement was very off from how I wanted it

Scrapping everything and moving onto yarn (I was in a fury that night hence the hectic background)


.png)