Ceratyr / David
Ceramics, Brushed Yarn, Wire, Masking Tape, White Glue, Chalk Pastels (dyeing
yarn), Mixed Media
David pictured with his predecessor the Lighthouse Keeper
Ceratyr is a ceramic figure exploring the
technical concept of articulation and pushing the traditional limitations of
ceramic clay. Articulation is deeply
rooted in my interests ever since I was a child playing with my brother’s
action figures. These toys could enact any story desired and each joint
breathed life into the figures as you moved them through space. This magical, almost life-like fluidity
inspired Ceratyr.
I challenged the ceramic
clay traditionally used for more structural work to its limit while sculpting
hinges and ball-joints capable of withstanding the strain of movement while
still staying true to the form. Since the
movement is so magical, it was natural the figure took on a fantastical
appearance. I wished for the figure to
have its focus on functioning movement and lifelikeness rather than its
personal features. I emphasized the
functionality over traditional beauty through a rugged angular form and modest
fur coverings. I ensured to include
enough flaws to solidify the idea that it is alive but limited the intimacy
with a lack of eyes and a neutral expression.
Similar to the action figure inspiration, the final piece has a living
presence in the room even as it idly sits but still follows the command of the
hands that move it.
Future Me Thoughts (Spring 2024)
I feel with every medium I work with there usually is one "winner," a piece I feel is the best representation of my skill and concepts, and David wins the ceramic category! He came out better than I imagined, he can move so well and is just incredible to hold (I particularly like the heft that the ceramic gives him). I mentioned the movement being magical in my write-up and yeah, he is magical! He was also definitely one of my most complex processes in making all his parts connect, so his WIP section is quite lengthy, but it would be injustice to cut it down too much.
On a final note, it took several months after completing him to give him a proper name (he was finished in late April and I didn't decide on a name until December). Ceratyr was a good temporary/registered title name, combining Ceramic and Satyr, but it wasn't super personal. In the end, I decided to change his name to David, both in reference to David Bowie (as I often joke he resembles) but also in how he is my equivalent of Michelangelo's David (a proportionally inaccurate statue that is somehow charismatic enough that people really it). I'm definitely not saying that my skill is anywhere NEAR Michelangelo, just that the concept is similar enough I got a chuckle out of it. Plus, a biblical name for a biblical creature just suits him!
WIP PHOTOS
My first attempt actually remained with the whole project! I used these kiln stilting rods thorough the project to ensure all the holes were the same size and lined up with each other. Being metal, with a little water they slid in and out easy and can push out the extra clay
The top of the leg is mostly hollow, though the other pieces are solid. I made him thin enough that most his limbs didn't need to be hollowed out for dry time
The legs are hinge joints that spoon inside each other
I almost immediately began on the body after the legs (which I had to be very careful with as the hingers were very fragile and brittle when dry. I actually broke them several times throughout my test fits...). I used references to make sure the human body was somewhat proportionate, though in the end it really isn't (not mathematically, though I think it is aesthetically)
I was stuck between him being a fully ball jointed doll or just go with the hinges (as the legs had to be hinges or else they'd over extend constantly). In the end I decided against full stringing as the limbs were too small to hollow completely, and the ball made the arms too long (as my legs were too short but I refused to remake them)
.JPG)
Major change stage! It's strongly recommended NOT to reactivate dried clay to add more as it cracks and can be structurally unsound... but I realized the legs had literally no way of connecting to the body. So I took the risk and soaked them in water until I was able to mush clay onto there (the changed leg joint on the left). There was some external cracking once the additions dried but nothing compromising. I also realized the waist bead was too big so I remade it smaller. FINALLY I changed the arm so that it was also a hinge joint to match the legs.
I made the other arm to match the first and did hands. Because of my hatred of duplicating mirrored limbs, I made the hands different. It helps to add interest and so that he can hold things.
Next the big one... his head! I had basically given up on perfect portions as his legs were small, torso short, arms too long, and his head too big... but I think it's fine in the end. Also in between this stage and the last I finally committed to redoing the pelvis to have more detail and better fit the new waist bead, part of what made his torso shorter
Refined his face a bit. My only real goal was putting a bump on his nose (a trait I find endearing and not used very often elsewhere) and thin lips. I didn't necessarily want him to be conventionally pretty to make him more believable and interesting as an individual
Before he was fired I made sure to test his range of motion in case I had to whittle down more parts of his body. In the end I took out quite a bit of his pelvis piece in the back and front
Despite breaking several things previously and knowing full well this thing was super fragile unfired, I did a test stringing anyway! It worked fine, it's okay! I was just too excited to see him come together before his final fire
Fired! From a very weird angle
Testing hair color, I liked the brown so I leaned into that for my glazing
I was quite proud of his head under glazing
Pink/red & brown under glaze (pink and red for his blushing)
Added black to darken it up
Fired again! I did a test clear glaze on his waist bead to make sure it worked before covering his whole body
The clear glaze unfired is blue which looks very strange (I made many blue man group jokes)
Fresh outta the kiln I had to string him I was so excited!
I masked off where the hair would go to attach it later
The original plan was to make a removeable wig, but I didn't have enough experience to do this new technique in the time I had. So, later I just reattached the tape mask with some white glue and then glued all the hair to it. Technically it is removeable in case of emergency but I'd rather not take it off
I got a wire that fit almost all the holes so I could attach the hinges (one knee joint was very unaligned in the final fire so only a twist tie could fit)
I strung him with some temporary yarn to test the joints
The final tie-off! The back of his head is open to allow me to string the yarn into the hole at the top
Unfortunately the yarn I chose knots in such a way where it stacks on top of itself rather than become bulkier, so I had to insert a bar so the knot wouldn't slip back inside the head
Hair before trimming
Hair after trimming!
I think his haircut looks like a mix between David Bowie from the Labyrinth as the Goblin King and Peter Gabriel during the Supper's Ready live era when he shaved his head badly down the middle and sides (the former inspiring his name)
Back view
I discovered while doing his hair that if positioned in the right way he is capable of sitting up by himself!
You thought we were done? Not yet! Next is an over-the-summer project to finish my vision of David having somewhere to sit. I wanted a throne for him, but not an obvious chair. So I decided on a tree stump which was inspired by the "living stump" phenomenon for it's interesting shape and lack of foliage
The base is constructed of pink insolation foam board covered with drywall compound (a similar substance to plaster)
Back view
The vines that cover the stump are crafted using the method from the staircase project, folded-over muslin fabric later glued together with a wire on the inside
I made a small handful of these
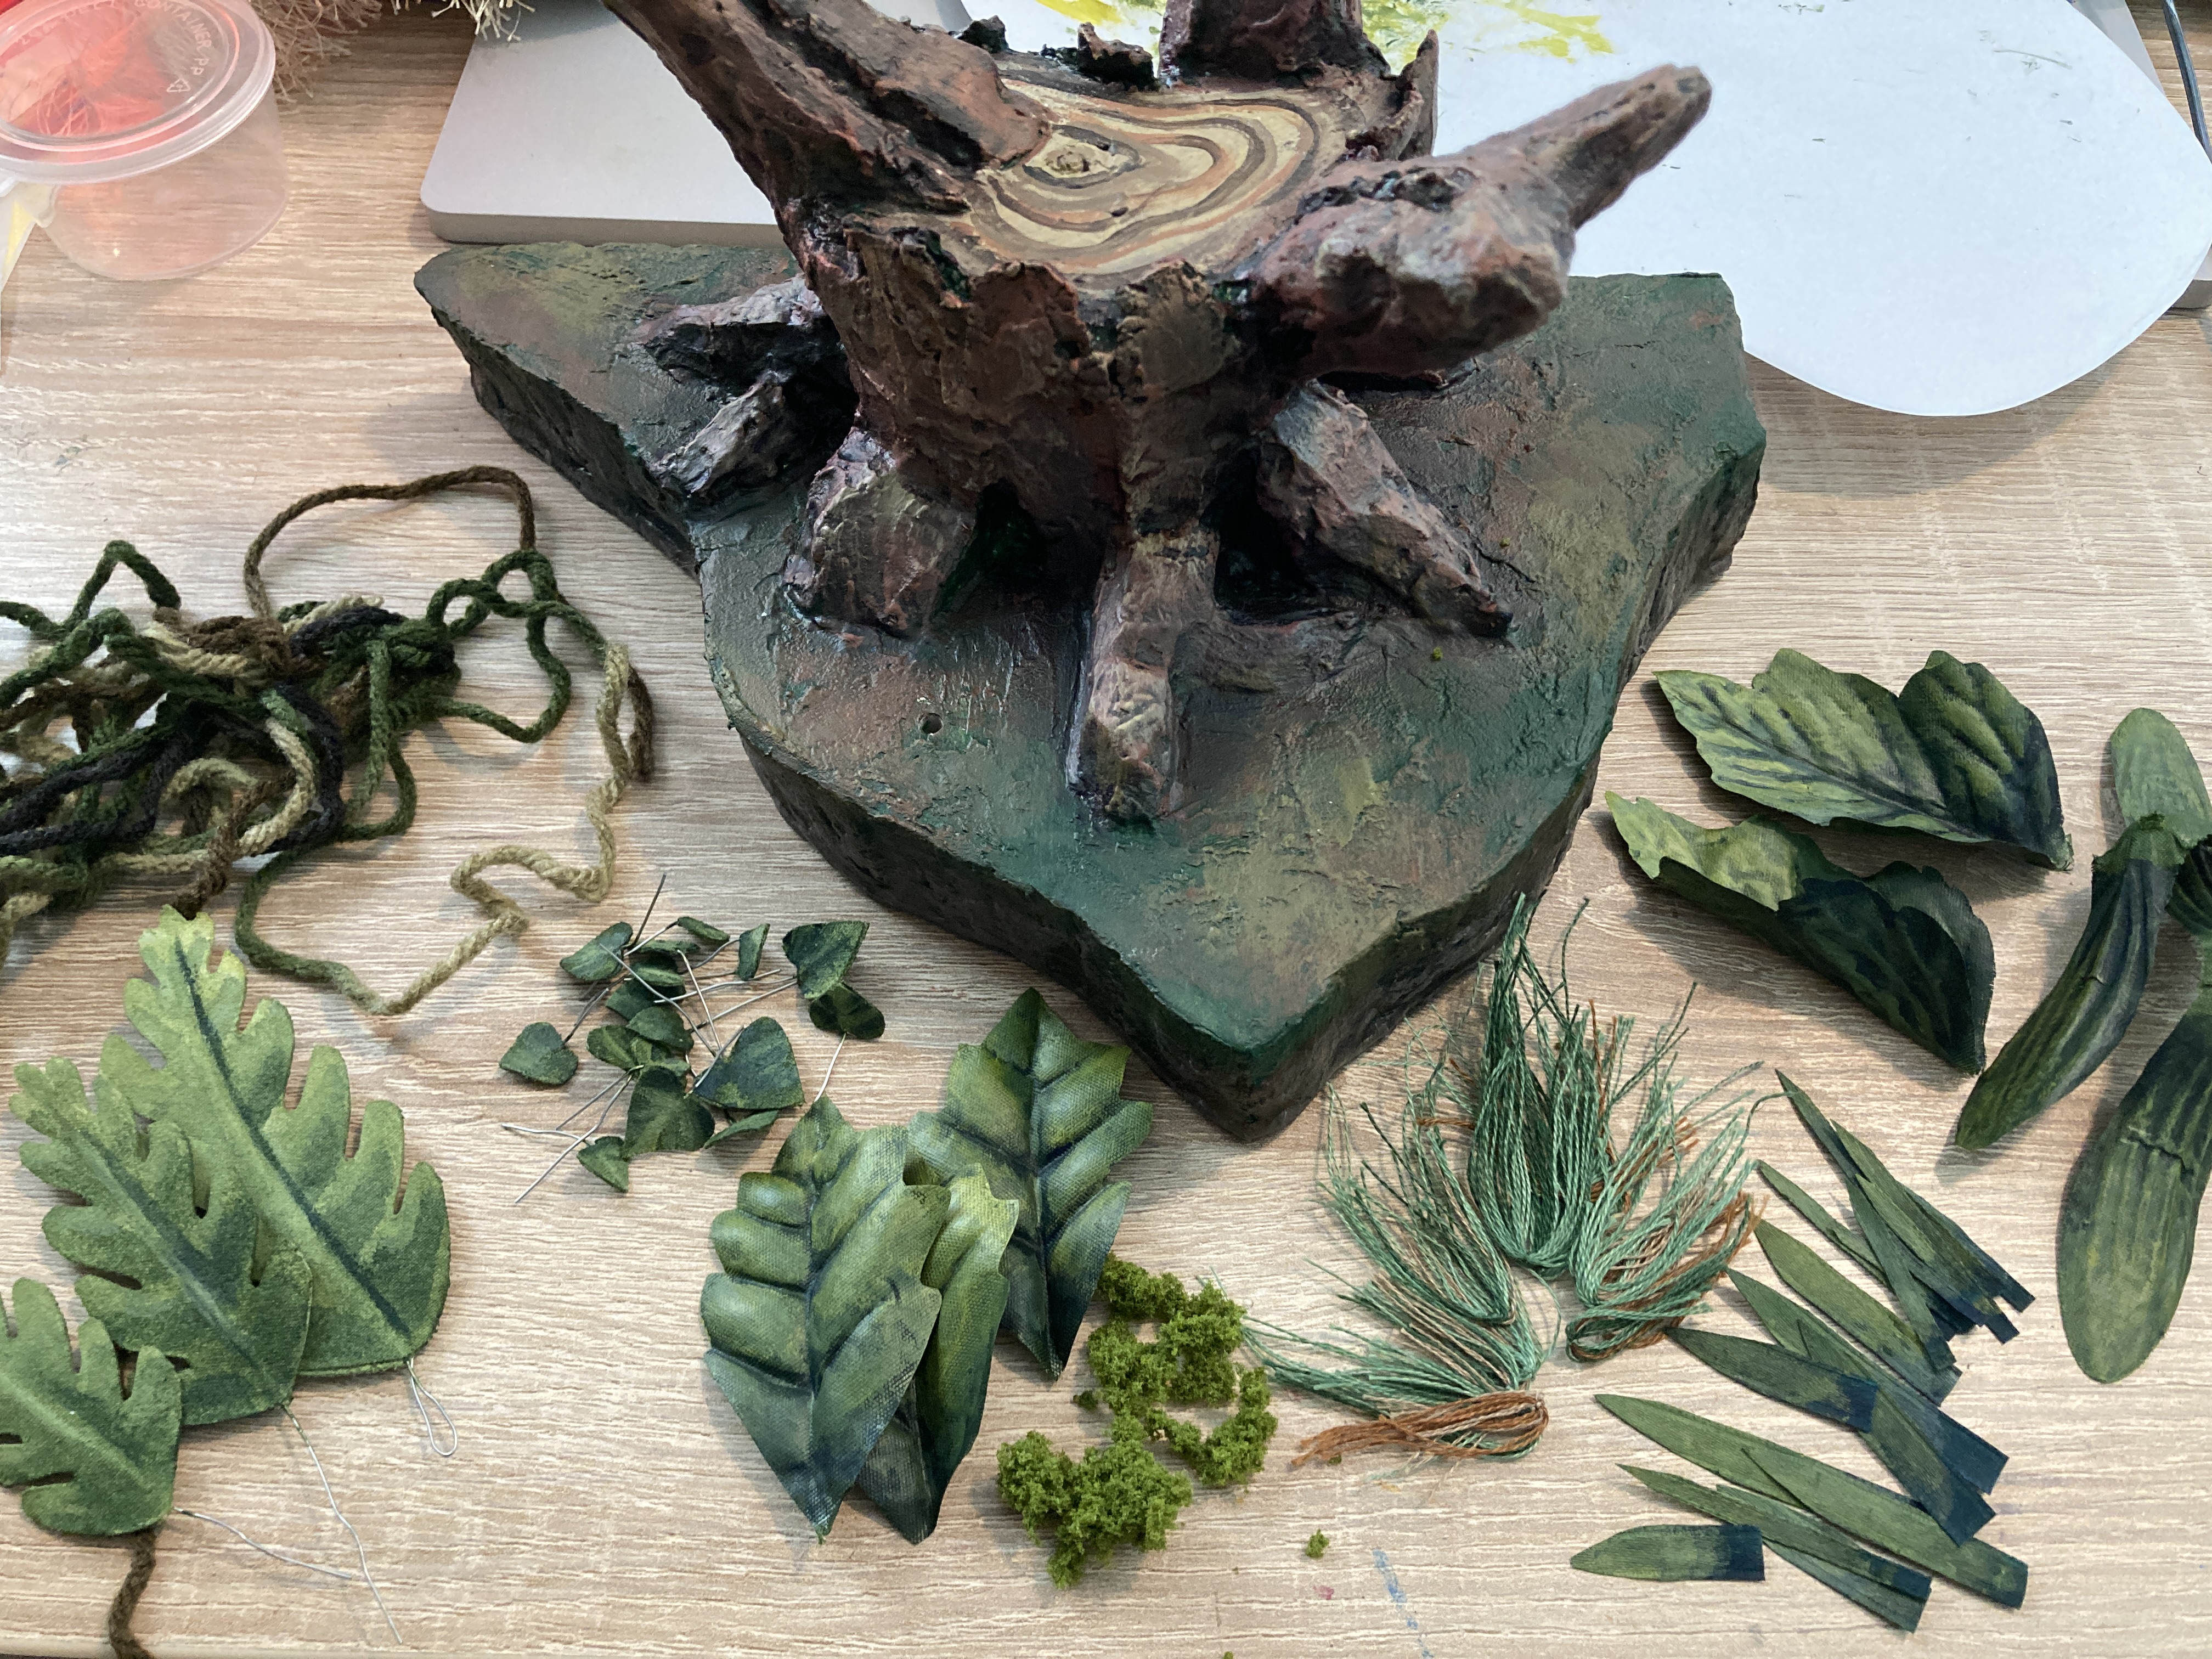
The final step was assembling the components I gathered to make the base seem full. These consisted of (left to right): variegated camo yarn for grass; ferns and vine leaves made with the fabric wire combo; fake leaves from flowers bunches painted with acrylic; diorama moss; grass made from single-ply embroidery thread bundles; ribbon cut and painted into thicker grass blades; and then finally more fake leaves painted to match the color scheme
.png)
.png)
.png)
.png)
.png)
.png)
.png)
.png)
.png)
.JPG)
.JPG)
.JPG)
.JPG)
.JPG)
.JPG)
.JPG)
.JPG)
.JPG)
.JPG)
.JPG)
.jpg)
.JPG)
.JPG)
.JPG)


.jpg)
.JPG)
.JPG)
.jpg)
.JPG)
.JPG)
.JPG)
.JPG)
.JPG)
.JPG)
.JPG)
.JPG)
.JPG)
.JPG)
.JPG)
.JPG)
.JPG)
.JPG)
.JPG)
.JPG)
.JPG)

.png)
.png)
.png)
.png)
.png)
.png)
.png)
.png)
.JPG)
.JPG)
.JPG)
.JPG)
.JPG)
.JPG)
.JPG)
.JPG)
.JPG)
.JPG)
.JPG)
.JPG)
.JPG)
.JPG)
.JPG)
.JPG)
.JPG)
.JPG)
.JPG)
.JPG)
.JPG)
.JPG)
.JPG)
.JPG)
.JPG)
.JPG)
.JPG)
.JPG)
.JPG)


.png)


.png)
.jpg)